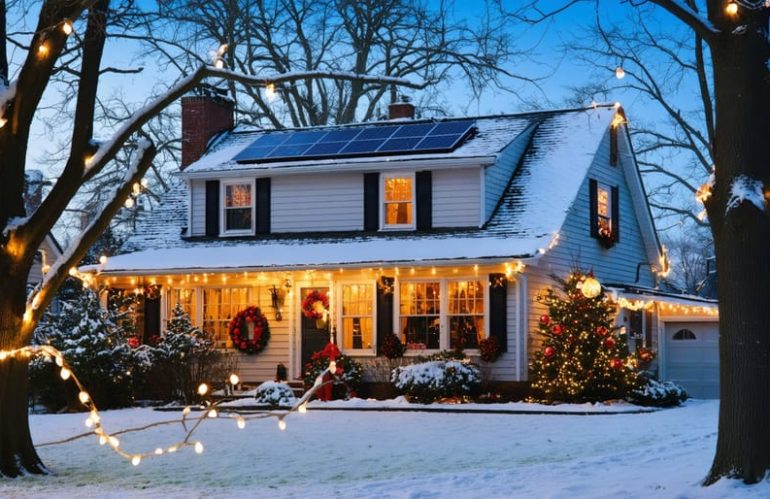
Transform your holiday decorations into an eco-friendly display by converting traditional Christmas lights to solar power. Modern solar Christmas lights combine festive charm with sustainable energy, eliminating the need for electrical outlets while reducing your holiday energy bills. Installing solar-powered holiday lighting takes just minutes – simply place the solar panel in a sunny location, connect your light strings, and enjoy automatic illumination from dusk till dawn. Whether you’re retrofitting existing lights with a solar converter or investing in ready-made solar string lights, this guide will show you how to create a magical holiday atmosphere powered entirely by the sun. You’ll discover how to select the right solar equipment, position panels for maximum efficiency, and maintain your system throughout the season, ensuring reliable performance even during shorter winter days.
How Solar Christmas Lights Actually Work
The Solar Panel Component
The heart of any solar-powered Christmas light system is its solar panel component. These compact yet efficient panels are specifically designed to convert sunlight into electrical energy that powers your festive displays. Understanding how solar Christmas lights function starts with these essential collectors.
Most solar panels for Christmas lights are small, typically measuring 4 to 6 inches square, and feature photovoltaic cells made from crystalline silicon. These cells work throughout the day to collect solar energy, even on cloudy days, though at reduced efficiency. The panels come with a stake for easy ground installation and usually include a weatherproof housing to protect the sensitive components from rain and snow.
For optimal energy collection, position your solar panel in a spot that receives direct sunlight for at least 6-8 hours daily. South-facing locations typically offer the best exposure in the Northern Hemisphere. The panel should be angled slightly to maximize sun exposure and prevent water accumulation. Some models even feature adjustable angles to help you find the perfect position for energy collection throughout the season.
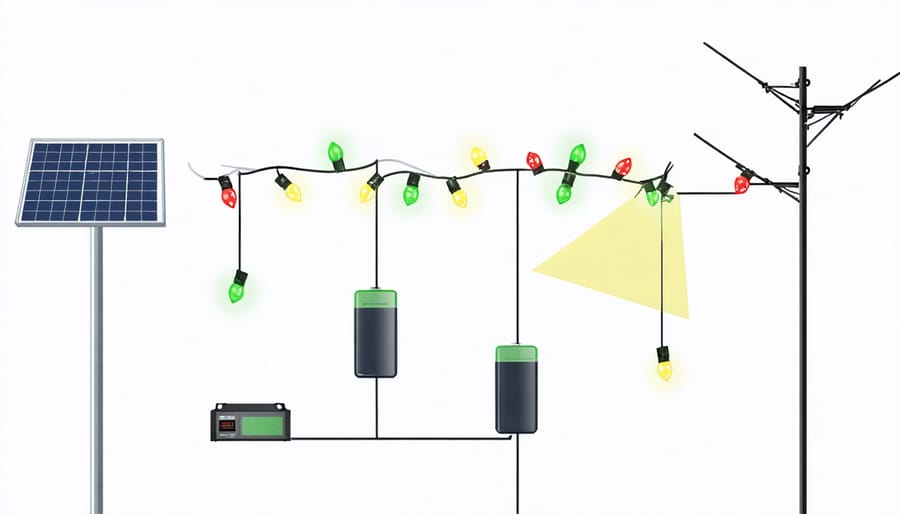
Battery Storage System
A reliable battery storage system is essential for keeping your solar-powered Christmas lights glowing after sunset. Deep-cycle batteries are ideal for this purpose, as they’re designed to provide steady power over long periods. Most solar Christmas light setups work well with a 12-volt deep-cycle battery, which can store enough energy to keep your lights shining throughout the night.
To ensure your lights stay bright all evening, your battery system should be properly sized based on your light display’s power consumption. A typical 100-count LED string uses about 7 watts, so you’ll need approximately 84 watt-hours of battery capacity to run them for 12 hours. Adding a charge controller between your solar panels and batteries prevents overcharging and extends battery life.
For optimal performance, place your battery storage system in a weatherproof container and locate it in a dry, temperature-controlled space. While sealed lead-acid batteries are common and cost-effective, lithium-iron-phosphate batteries offer better performance and longer lifespan, though at a higher initial cost. Regular maintenance, including checking connections and monitoring battery levels, will help ensure your solar Christmas light display remains reliable throughout the holiday season.
Converting Traditional Christmas Lights to Solar
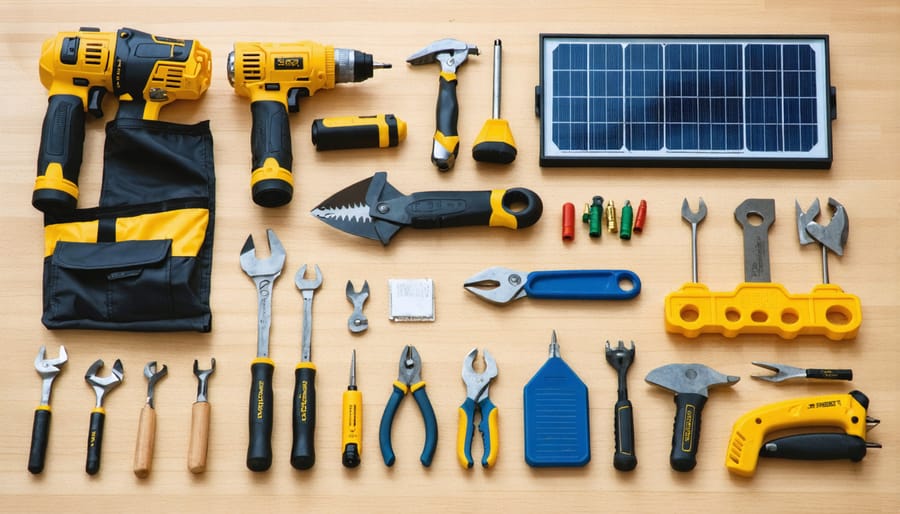
Required Materials and Tools
To convert your Christmas lights to solar power, you’ll need the following materials and tools:
Essential Components:
– Solar panel (6V-12V, depending on your light string requirements)
– Rechargeable battery pack (preferably lithium-ion)
– Solar charge controller
– Battery holder or enclosure
– Waterproof junction box
– Wire connectors and electrical tape
– UV-resistant wire (gauge appropriate for your lights)
– Zip ties or mounting brackets
Basic Tools:
– Wire strippers/cutters
– Phillips head screwdriver
– Multimeter
– Heat shrink tubing
– Soldering iron and solder (optional)
– Drill and bits (for mounting)
Additional Protection:
– Silicone sealant
– Weatherproof covers
– Clear plastic tubing (for wire protection)
Optional but Recommended:
– Timer or light sensor
– Voltage regulator
– Extra fuses
– Anti-corrosion spray
Make sure all electrical components are rated for outdoor use and can handle your local weather conditions. It’s recommended to purchase components from reputable suppliers to ensure safety and longevity of your solar-powered Christmas light setup.
Installation Steps
Let’s walk through the process of converting your Christmas lights to solar power. Start by gathering your materials: a solar panel kit (typically 5-10 watts), a compatible battery pack, a charge controller, and weatherproof housing for your components.
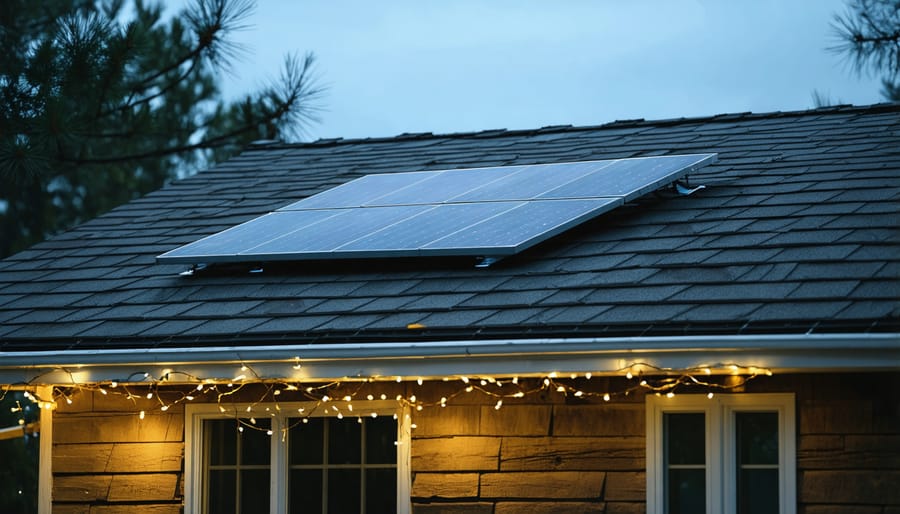
Begin by positioning your solar panel in a location that receives maximum sunlight during the day. Ideally, mount it on a south-facing surface at a 30-45 degree angle. Ensure the panel is securely fastened and elevated enough to avoid snow buildup in winter.
Next, connect your charge controller to the solar panel following the manufacturer’s guidelines. The charge controller prevents overcharging and extends battery life. Install your battery pack in the weatherproof housing, making sure all connections are properly insulated and protected from the elements.
Wire your Christmas lights to the battery pack through the charge controller. Most solar kits come with appropriate connectors, but you may need to modify your light strings using wire nuts and electrical tape. Test the connection during daylight hours to ensure proper charging.
Install a timer between the battery and lights to maximize efficiency. Program it to turn on at dusk and off at your preferred time. This helps conserve battery power for longer evening displays.
Finally, weatherproof all connections using silicone sealant and ensure your housing is properly ventilated to prevent moisture buildup. Test your setup for several days before finalizing the installation, adjusting the panel angle if needed for optimal charging.
Remember to clean your solar panel periodically and check connections before each holiday season to maintain peak performance. With proper installation, your solar-powered Christmas lights should provide reliable, eco-friendly illumination throughout the holiday season.
Best Practices and Tips
Optimal Panel Placement
The success of your solar-powered Christmas lights largely depends on how you optimize your solar panel placement. For maximum efficiency, position your panels where they’ll receive direct sunlight for at least 6-8 hours daily. South-facing locations typically offer the best exposure in the Northern Hemisphere, while north-facing spots work better for Southern Hemisphere residents.
Avoid areas shadowed by trees, buildings, or other structures, as even partial shade can significantly reduce solar charging efficiency. Mount your panels at a 30-45 degree angle to maximize sunlight absorption during winter months when days are shorter. If possible, install adjustable mounting brackets to modify the angle seasonally.
Consider elevating your panels slightly off the ground to prevent snow accumulation and ensure proper drainage during wet weather. For roof-mounted installations, choose a spot that’s easily accessible for maintenance and cleaning. Remember that panels don’t need to be directly next to your Christmas light display – you can use extension cables to reach optimal sunlight locations while keeping your decorative arrangement exactly where you want it.
Keep your panels clean and free from debris, particularly during the holiday season when falling leaves and snow can impact performance. A quick weekly wipe-down can make a significant difference in charging efficiency.
Maintenance and Care
Regular maintenance ensures your solar-powered Christmas lights remain bright and efficient for many seasons. Start by keeping the solar panels clean from dust, leaves, and snow – a gentle wipe with a soft, damp cloth is usually sufficient. Position your panels where they receive maximum sunlight and regularly check for any debris or shadows that might block solar exposure.
When it comes to maintaining solar Christmas lights, battery care is crucial. Most systems use rechargeable batteries that should be replaced every 1-2 years, depending on usage. During off-season storage, remove the batteries and store them in a cool, dry place to prevent corrosion.
Inspect your light strings periodically for any signs of wear, loose connections, or damaged bulbs. Replace any broken LED bulbs promptly to maintain the circuit’s integrity. When storing your lights, wrap them carefully around a piece of cardboard or use a light reel to prevent tangling and wire damage.
For optimal performance, consider testing your lights before the holiday season begins. This gives you time to address any issues and ensure everything works perfectly when you’re ready to decorate. Store the entire system in a weather-protected area when not in use, and keep the user manual handy for troubleshooting guidance.
Cost Savings and Environmental Benefits
Converting your Christmas lights to solar power offers substantial financial and environmental benefits that extend far beyond the holiday season. A typical household can save between $10-30 on their December electricity bill by switching to solar-powered Christmas lights, with savings increasing for larger displays. Over a five-year period, these savings can amount to $50-150, easily offsetting the initial investment in solar equipment.
From an environmental perspective, solar-powered Christmas lights significantly reduce your carbon footprint. Traditional Christmas light displays can consume up to 150 kWh of electricity during the holiday season, contributing to approximately 100 pounds of CO2 emissions. By switching to solar, you eliminate these emissions entirely while still maintaining the festive atmosphere.
Solar-powered Christmas lights also offer practical advantages. They’re completely independent of your home’s electrical system, allowing for more flexible placement options and eliminating the need for outdoor electrical outlets or extension cords. This independence also means your holiday display continues to shine even during power outages.
The environmental impact extends beyond energy consumption. Solar-powered Christmas lights typically use LED bulbs, which last 25 times longer than traditional incandescent bulbs. This longevity means fewer replacements and less waste in landfills. Additionally, most solar Christmas light systems come with rechargeable batteries, further reducing battery waste compared to battery-operated alternatives.
Making your Christmas lights solar-powered is a simple yet impactful way to embrace sustainable holiday decorating. By following the steps outlined above, you can create a festive display that’s both environmentally friendly and cost-effective. Whether you choose to convert existing lights or invest in ready-made solar Christmas lights, you’ll be reducing your carbon footprint while enjoying the same magical holiday atmosphere. The initial investment quickly pays for itself through eliminated electricity costs, and you’ll gain the freedom to decorate areas far from power outlets. As solar technology continues to improve, there’s never been a better time to make the switch to solar-powered holiday lighting. Join the growing number of homeowners who are making their Christmas celebrations more sustainable while keeping the spirit of the season bright and merry.