Solar street lights are revolutionizing urban illumination by harnessing clean, renewable energy to light our communities while dramatically reducing electricity costs and environmental impact. These innovative lighting solutions combine advanced photovoltaic technology with efficient LED fixtures to deliver reliable, maintenance-free lighting that operates independently of the traditional power grid.
The transition to solar street lighting represents a crucial step toward sustainable urban infrastructure, offering municipalities and property owners a practical way to enhance public safety while embracing green energy solutions. With minimal upfront investment and significant long-term savings, solar street lights provide an intelligent alternative to conventional lighting systems, particularly in remote areas or locations with unreliable power supplies.
Installing solar street lights requires careful planning and consideration of various factors, from solar exposure and weather patterns to mounting requirements and lighting specifications. This comprehensive guide will walk you through the essential steps of solar street light installation, ensuring optimal performance and longevity of your lighting system. Whether you’re a city planner, contractor, or property owner, understanding the proper installation process is crucial for maximizing the benefits of this sustainable lighting solution.
Planning Your Solar Street Light Installation
Site Assessment and Light Placement
Proper site assessment and light placement are crucial for maximizing the efficiency of your solar street lighting system. Begin by conducting a thorough solar analysis of your installation area, considering factors like shade patterns throughout the day and seasonal variations in sunlight exposure. Following solar-integrated design principles will ensure optimal performance year-round.
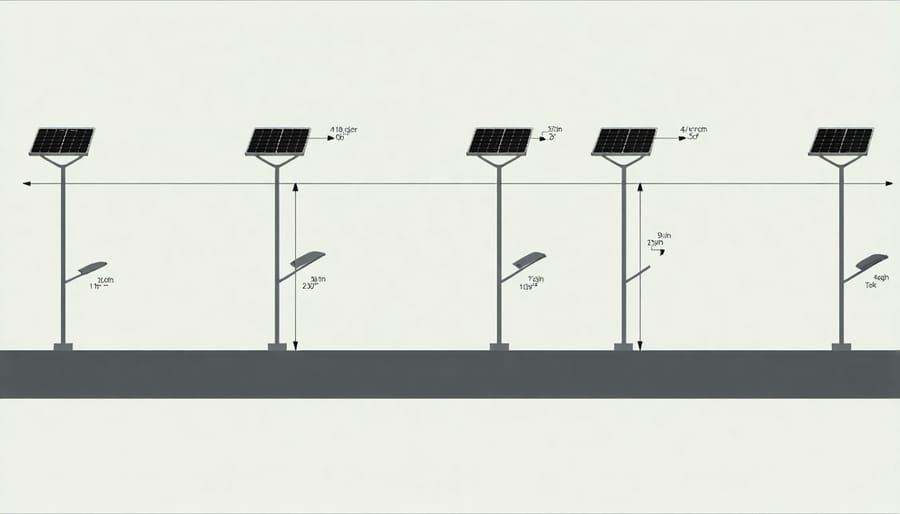
When determining light positions, space fixtures at intervals of 80-100 feet for residential areas and 60-80 feet for commercial zones. This spacing ensures adequate illumination while preventing dark spots between lights. Consider the height of your poles carefully – typically 15-20 feet works well for residential areas, while commercial spaces might require heights of 20-25 feet.
Pay special attention to surrounding obstacles like trees, buildings, or other structures that could cast shadows on the solar panels. Position lights away from these obstructions, ideally with clear southern exposure in the Northern Hemisphere. For maximum efficiency, tilt solar panels at an angle equal to your location’s latitude.
Remember to check local zoning regulations and lighting requirements before finalizing placement. Many municipalities have specific guidelines for light pollution control and minimum illumination standards. Mark your proposed light locations clearly and verify underground utility locations before proceeding with installation.
Solar Panel Orientation and Sizing
The success of your solar street light installation heavily depends on optimal panel positioning and appropriate sizing. For maximum efficiency, solar panels should be tilted at an angle equal to your location’s latitude, typically between 30-45 degrees in most regions. This angle ensures optimal sunlight absorption throughout the year, with slight adjustments possible for summer and winter seasons.
When determining panel size, consider your area’s average daily sunlight hours and the light fixture’s power requirements. A general rule of thumb is to choose a panel that generates 20% more power than your light’s daily consumption to account for cloudy days and system losses. For example, if your LED light consumes 40 watts for 12 hours, you’ll need a panel rated at least 120 watts.
The panel’s orientation should face true south in the Northern Hemisphere (or true north in the Southern Hemisphere) to maximize sun exposure. Avoid locations where trees, buildings, or other structures might cast shadows on the panels during peak sunlight hours. Remember that even partial shading can significantly reduce the panel’s efficiency.
For areas with heavy snow or frequent dust storms, consider installing panels at a steeper angle to promote natural cleaning through rainfall and snow sliding. This self-cleaning feature reduces maintenance needs while maintaining optimal performance throughout the year.
Essential Components and Materials
Choosing the Right Light Fixtures
Selecting the right LED fixtures for your solar street light installation is crucial for optimal performance and longevity. When evaluating options, focus on lumens output rather than wattage, as this more accurately indicates brightness. For residential areas, fixtures producing 3,000-6,000 lumens typically provide adequate illumination, while commercial areas may require 8,000-15,000 lumens.
Look for fixtures with an IP65 rating or higher to ensure weather resistance and durability. The color temperature matters too – warm white (2700-3000K) creates a cozy ambiance for residential areas, while cool white (4000-5000K) offers better visibility for security purposes. Like other space-efficient solar solutions, modern LED fixtures are compact yet powerful.
Consider fixtures with adjustable mounting brackets for optimal positioning and integrated motion sensors to enhance energy efficiency. The light distribution pattern should match your needs – choose between symmetric patterns for open areas or asymmetric patterns for pathways and roadways.
Quality manufacturers usually offer warranties of 5-10 years, indicating confidence in their products’ durability. While premium fixtures may cost more initially, they typically deliver better long-term value through improved efficiency and reduced maintenance needs.
Battery and Control Systems
The heart of any solar street light system lies in its battery and control components. Modern solar street lights typically use lithium-ion batteries, which offer superior performance and longer lifespan compared to traditional lead-acid batteries. These batteries store energy collected during daylight hours, ensuring reliable illumination throughout the night.
Smart control systems enhance the efficiency of solar street lights through automated operation. Motion sensors can dim the lights when no activity is detected and brighten them when movement is sensed, maximizing battery life while maintaining security. Many systems also include light sensors that automatically adjust operation based on natural light levels, turning on at dusk and off at dawn.
The control panel, usually housed in a weather-resistant enclosure, manages charging cycles and protects the battery from overcharging or excessive discharge. Modern systems often include remote monitoring capabilities, allowing you to check battery levels, light performance, and system health through a smartphone app or web interface.
When selecting your battery system, consider factors like local weather patterns, required runtime, and maintenance accessibility. A properly sized battery should provide 3-4 days of autonomy during periods of limited sunlight, ensuring consistent performance year-round.
Step-by-Step Installation Process
Foundation and Pole Installation
A solid foundation and proper pole installation are crucial for the long-term stability and performance of your solar street light. Start by marking the installation spot and digging a hole that’s roughly 2 feet wide and 3-4 feet deep, depending on your local soil conditions and frost line requirements.
Pour a concrete foundation mixture into the hole, ensuring it’s level and properly cured. The concrete base should extend slightly above ground level to prevent water pooling around the pole. Remember to insert anchor bolts into the wet concrete at precise positions matching your pole’s base plate.
When mounting the pole, use a level to ensure it stands perfectly vertical. This is essential for optimal solar panel performance and even light distribution. Secure the pole base to the anchor bolts using heavy-duty nuts and washers, and double-check that all connections are tight.
For areas with strong winds, consider installing guy-wires at three equally spaced points around the pole for additional support. These should be anchored securely in the ground and properly tensioned.
Before proceeding with the solar panel and light fixture installation, allow the foundation to cure completely – typically 24-48 hours, depending on weather conditions and concrete mix. This waiting period ensures your solar street light will have the stable base it needs for years of reliable service.
Solar Panel and Light Assembly
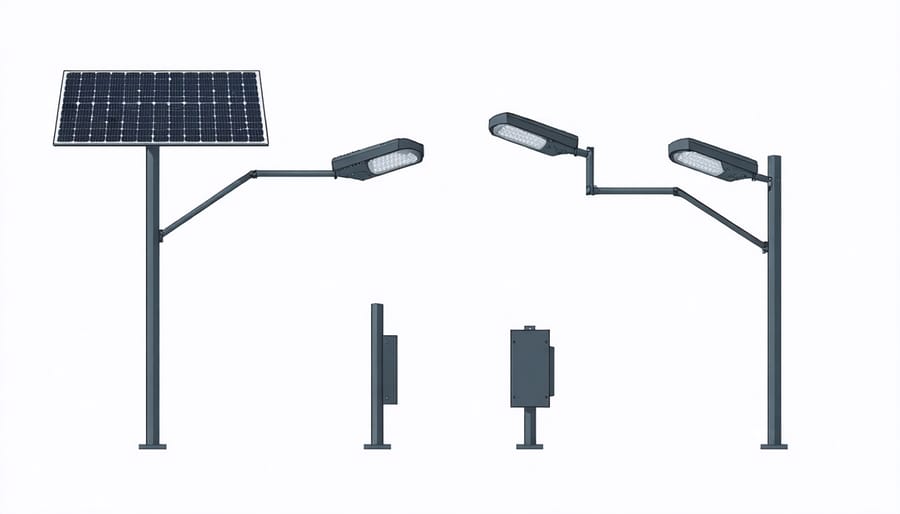
The mounting of solar panels and light assemblies requires careful attention to detail for optimal performance and longevity. Begin by securing the mounting bracket to the pole’s top section, ensuring all bolts are properly tightened to manufacturer specifications. The solar panel should be oriented toward the south in the Northern Hemisphere (or north in the Southern Hemisphere) at an angle typically between 30-45 degrees for maximum sun exposure.
When connecting the solar panel to the light fixture, use weather-resistant cables and connections to prevent moisture damage. The aesthetic solar integration should balance both functionality and visual appeal, particularly in residential areas. Double-check that all wiring connections are secure and properly insulated.
The LED light fixture should be mounted securely to the pole arm, with its photocell sensor unobstructed to ensure proper day/night operation. Install the battery box at a height that allows for easy maintenance while remaining out of reach for security purposes. Most systems include quick-connect cables that are color-coded for foolproof assembly.
Finally, weatherproof all connection points using silicon sealant or appropriate weather protection materials. This step is crucial for preventing water infiltration and ensuring the system’s durability. Once assembled, test the connections before final mounting to verify all components are working correctly.
Wiring and Control System Setup
The wiring setup for your solar street light is a crucial step that ensures optimal performance. Start by connecting the solar panel to the charge controller using the provided cables, making sure to match the positive (red) and negative (black) terminals correctly. The charge controller should then be connected to the battery bank, maintaining the same polarity. Finally, connect the LED light fixture to the charge controller’s output terminals.
Most modern solar street lights come with a built-in control system that automatically manages the light’s operation. To program your system, locate the control panel on the charge controller. Set the working hours by adjusting the timer settings – typically, you’ll want the lights to activate at dusk and turn off at dawn. Many controllers allow you to set different brightness levels for different times of the night to maximize energy efficiency.
Check all connections are secure and properly insulated to prevent moisture damage. Use weather-resistant cable ties to organize the wiring neatly along the pole. Test the system by covering the photocell sensor – this should trigger the light to turn on. If your system includes remote monitoring capabilities, connect it to your local network following the manufacturer’s instructions.
Remember to document your wiring configuration and keep the controller’s manual handy for future reference. This will be invaluable during maintenance or troubleshooting.
Maintenance and Troubleshooting
Regular maintenance is key to ensuring your solar street lights perform optimally for years to come. Start with a quarterly cleaning schedule for the solar panels – simply use mild soap and water to remove dust, bird droppings, and other debris that can reduce efficiency. During cleaning, inspect the panels for any cracks or damage that might affect performance.
Check the battery compartment annually for signs of corrosion or water damage. If you notice any white powder around the terminals, clean them carefully with a wire brush. Ensure all connections remain tight and secure. The LED fixtures typically require little maintenance, but verify they’re properly sealed to prevent moisture infiltration.
When troubleshooting common issues, start with the basics. If lights aren’t turning on at night, first check if the photocell sensor is clean and unobstructed. Sometimes, nearby light sources can confuse the sensor. For dimming issues, verify the battery is charging properly during daytime hours and consider whether recent weather patterns might have affected charging capacity.
Keep detailed maintenance records, including dates of cleaning, repairs, and any observed issues. This documentation helps track performance patterns and predict potential problems before they become serious. Most solar street light systems have a lifespan of 8-10 years, but proper maintenance can extend this considerably.
If you encounter persistent problems, consult your system’s manual or contact the manufacturer. Some issues might be covered under warranty, and attempting DIY repairs could void your coverage. For optimal performance, schedule professional inspections every two years to assess overall system health and make necessary adjustments.
Installing solar street lights represents a significant step toward creating more sustainable and energy-efficient communities. By harnessing the power of the sun, these innovative lighting solutions offer multiple benefits that extend far beyond simple illumination. From dramatic reductions in energy costs to minimal maintenance requirements and enhanced environmental stewardship, solar street lights are proving to be a smart investment for our urban future.
Throughout this guide, we’ve explored the essential aspects of solar street light installation, from initial site assessment to final testing. We’ve seen how proper planning, correct positioning, and quality components all play crucial roles in ensuring optimal performance. The straightforward installation process, when followed carefully, results in reliable lighting systems that can serve communities for many years to come.
As our cities continue to grow and evolve, the adoption of sustainable lighting solutions becomes increasingly important. Solar street lights represent a perfect blend of practical functionality and environmental responsibility. They offer independence from the traditional power grid, reduced carbon footprint, and long-term cost savings that make them an attractive option for both public and private installations.
We encourage you to consider solar street lights for your next lighting project. With advancing technology making these systems more efficient and affordable than ever, there’s never been a better time to embrace this sustainable lighting solution. By making the switch to solar, you’re not just illuminating paths – you’re lighting the way to a greener, more sustainable future.