Protecting your solar-charged EVs paint starts with three fundamentals: washing every two weeks, applying a quality ceramic coating or paint protection film, and using a breathable car cover during extended stationary periods. The challenge is real. Your vehicle needs to sit outdoors to capture sunlight for charging, which means constant exposure to UV rays, bird droppings, tree sap, and weather extremes that can fade, oxidize, and damage your paint within months.
Most EV owners face a trade-off. You want the financial and environmental benefits of solar charging, but you need your car parked in direct sun for hours each day. That exposure accelerates paint degradation faster than garage-kept vehicles experience. The good news? A systematic protection routine takes less than an hour every two weeks and can preserve your vehicle’s finish for years, protecting your resale value and keeping your sustainable investment looking sharp.
This guide walks you through the complete process, from selecting the right protective products to establishing a maintenance schedule that fits your climate. You’ll learn which coatings work best for outdoor conditions, how to spot early paint damage, and when a car cover helps versus when it traps moisture and causes more harm. Whether you’re parking under open sky or near trees, these steps work for any outdoor solar charging setup. For professional-grade solutions, Tesla paint protection in Brisbane offers comprehensive coverage when DIY methods aren’t enough.
Why Outdoor-Parked EVs Need Extra Paint Protection
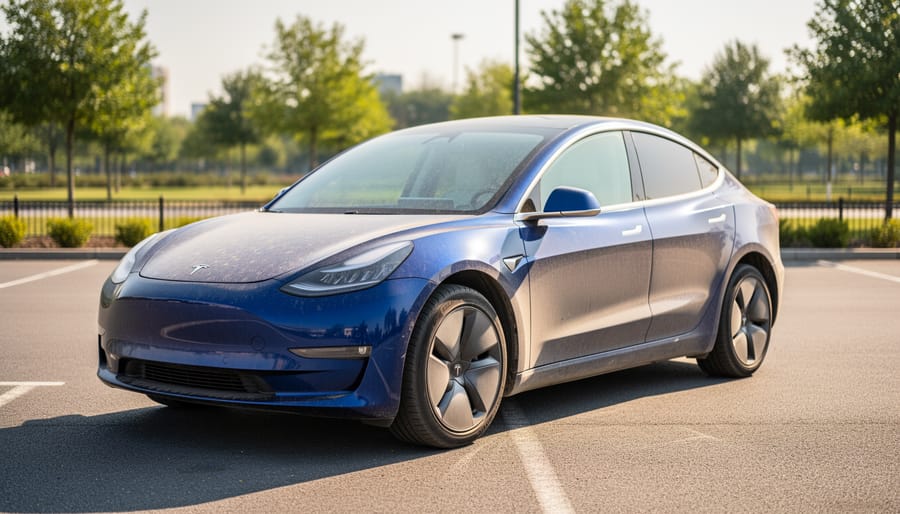
Your EV’s paint faces a relentless assault when parked outdoors daily, especially in the same sun-drenched spot where solar charging happens. UV radiation breaks down the clear coat’s molecular structure over time, causing that characteristic faded, chalky appearance that signals oxidation. The damage compounds because solar-charged vehicles often occupy prime sunny real estate by design, exposing the paint to peak UV hours every single day.
Acid rain adds another layer of destruction. Modern precipitation carries industrial pollutants that etch into clear coats, leaving permanent water spots and dull patches if not removed quickly. Tree sap creates sticky, acidic deposits that bond to paint in hot sun, requiring aggressive removal that can scratch the surface if done incorrectly. Bird droppings are surprisingly corrosive, with their high uric acid content eating through clear coat in as little as 48 hours during warm weather. Bird-proofing your rooftop solar panels helps, but the paint below still needs dedicated protection.
Here’s the critical myth to dispel: modern clear coats are not maintenance-free. Manufacturers design them to withstand normal use with garage storage and occasional exposure. Constant outdoor parking wasn’t the baseline scenario. Your EV’s clear coat is a sacrificial layer meant to protect the paint beneath, but it degrades faster under continuous environmental stress. Vehicles with rooftop solar panels face an additional challenge because they can’t hide under carports or partial shade without compromising charging efficiency. The same positioning that maximizes energy generation maximizes paint exposure to every damaging element nature offers.
Without proactive protection, you’re looking at permanent paint damage within 18 to 24 months of daily outdoor exposure.
What You’ll Need to Protect Your EV’s Paint
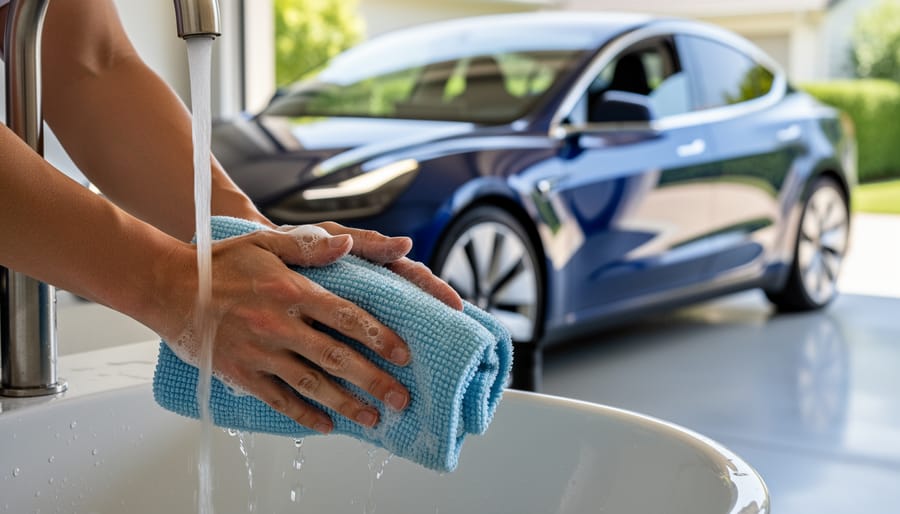
Protecting your EV’s paint outdoors isn’t complicated, but you do need the right supplies. Having everything ready before you start makes the job faster and ensures you won’t damage your paint by improvising with household products that weren’t designed for automotive finishes.
Essential Items
- pH-neutral car wash soap, formulated to clean without stripping protective coatings or damaging clear coat
- Microfiber wash mitts, trap dirt safely rather than grinding it into paint like sponges do
- Microfiber drying towels, absorb water without scratching and prevent water spots
- Clay bar kit, removes embedded contaminants that washing can’t touch, creating a smooth surface
- Ceramic coating or paint sealant, creates a protective layer that repels water, UV rays, and contaminants
- Two buckets, one for soapy water, one for rinsing your mitt to avoid reintroducing dirt
- Breathable car cover, shields paint from sun, debris, and bird droppings during extended parking
The ceramic coating deserves special attention. It bonds chemically to your paint and can last one to five years depending on the product quality and your maintenance routine. Paint sealants are easier to apply and more forgiving for beginners, but they typically need reapplication every three to six months. Either option vastly outperforms traditional wax for outdoor protection.
Optional But Helpful
A foam cannon attachment for your hose creates thick suds that lift dirt before you touch the paint, reducing scratch risk. Detailing spray works well for quick touch-ups between full washes when you spot fresh bird droppings or pollen. UV protectant spray adds an extra layer of sun defense for plastic trim and rubber seals, which degrade faster than paint under constant exposure.
You’ll find these items at auto parts stores or online. Budget around $150 to $200 for quality versions of the essentials, plus $50 to $150 for a good ceramic coating depending on the brand.
Safety and Preparation Tips
Before you start protecting your EV’s paint, proper preparation prevents costly mistakes. Never wash or apply coatings in direct sunlight or when the paint feels warm to the touch, heat causes products to dry too quickly, leaving streaks and uneven coverage that are difficult to remove. Work in shade or during cooler morning hours instead.
Always test new products on a hidden area first, like the lower door jamb or behind a mirror, to ensure they won’t discolor or damage your specific paint finish. When applying ceramic coatings or sealants, work in a well-ventilated space, fumes from these products can be strong and require adequate airflow.
Check your EV manufacturer’s care guide before starting, as some models have specific recommendations or warnings about pressure washing, certain chemicals, or areas to avoid. If your vehicle has rooftop solar panels, the same precautions that apply to cleaning solar panels matter here, avoid high-pressure water near panel edges and connections, where seals can be compromised. Gather all your materials before you begin so you can work efficiently without rushing between steps.
Step-by-Step Paint Protection Process
Step 1: Deep Clean and Decontaminate the Paint
Start with a thorough rinse using a garden hose or pressure washer set to low pressure. This removes loose dirt and debris that could scratch the paint during washing. Pay attention to crevices around door handles, charging ports, and the solar panel mounting areas on the roof.
Fill two buckets: one with pH-neutral car wash soap mixed according to package directions, the other with clean rinse water. The two-bucket method prevents you from reintroducing dirt onto your paint. Dip your microfiber wash mitt in the soapy water, wash a section, then rinse the mitt in the clean water bucket before reloading with soap.
Work from the roof down to the lower panels. This top-to-bottom approach keeps dirty water from running onto sections you’ve already cleaned. Use light pressure and straight motions rather than circles. Rinse each section as you go, and give the entire vehicle a final rinse to remove all soap residue.
Once the paint is dry, use a clay bar kit to decontaminate the surface. Spray the included lubricant on a small area, then glide the clay bar gently across the paint using overlapping strokes. The clay pulls out embedded contaminants like industrial fallout, brake dust, and tree sap that washing can’t remove. You’ll feel the paint become noticeably smoother.
This deep clean creates the clean, contaminant-free surface that ceramic coatings and sealants need to bond correctly. Any dirt or residue trapped under a protective layer will prevent proper adhesion and reduce effectiveness.
Step 2: Apply a Protective Barrier (Ceramic Coating or Sealant)
With your paint clean and decontaminated, you’re ready to apply a protective barrier that shields against UV rays and environmental contaminants. You have two main options: ceramic coatings and paint sealants. Ceramic coatings create a harder, longer-lasting bond with your clear coat (typically 1-3 years), but they demand precise application and longer cure times. Paint sealants are more forgiving, easier to apply, and last 3-6 months, making them ideal if you’re new to paint protection or prefer more frequent reapplication.
Whichever product you choose, the application process rewards patience and attention to detail:
- Work in a shaded area with temperatures between 60-80°F. Direct sun or hot paint will cause products to flash too quickly, creating streaks and uneven coverage.
- Apply product to a foam applicator pad, not directly onto the paint. Use only a few drops, less is genuinely more with these concentrated formulas.
- Work one small section at a time (2×2 feet), using straight, overlapping passes. Avoid circular motions that can create uneven thickness.
- Allow the product to flash (turn hazy or rainbow-like) for the time specified on the bottle, typically 30-60 seconds for sealants, 1-3 minutes for ceramic coatings.
- Buff off with a clean microfiber towel using light pressure and straight motions. Flip to a fresh section of the towel frequently.
- Move to the adjacent section and repeat, maintaining wet edges to avoid lap marks where sections meet.
After completing the entire vehicle, let it cure undisturbed. Sealants usually need 1-2 hours before exposure to moisture, while ceramic coatings require 24-48 hours and should stay completely dry during that period. Read your specific product’s instructions carefully, as cure times and application techniques can vary between brands. Don’t rush this step, proper curing determines how well your protection performs over months of outdoor exposure.
Step 3: Add Physical Protection for Extended Parking
When you’re leaving your solar-charged EV parked for more than a couple of days, a quality car cover adds another layer of defense against the elements. The key word here is breathable, choose a multi-layer fabric designed for outdoor use that allows moisture to escape while blocking UV rays, dust, and debris. Non-breathable covers trap condensation underneath, which creates more problems than it solves.
Before covering your vehicle, make absolutely certain the paint is bone-dry. Even slight dampness trapped under a cover can lead to water spots or encourage mildew growth. Take a few extra minutes to wipe down door jambs and any areas where water might hide.
Secure the cover properly using the built-in straps or elastic hems. A loose cover whipping in the wind acts like sandpaper against your paint, scratching the very surface you’re trying to protect. Some covers include grommets for tie-down straps in high-wind areas.
For daily drivers, skip the cover, it’s impractical and unnecessary if you’ve applied ceramic coating. Covers shine when you’re traveling for a week, storing the vehicle seasonally, or parking under trees that drop constant debris. The trade-off is convenience versus protection, and for short-term parking, your ceramic coating handles the job.
Step 4: Establish a Maintenance Schedule
A protection routine only works if you actually follow it. Here’s a realistic maintenance schedule that keeps your outdoor-parked EV’s paint in top condition without consuming your weekends.
Weekly: Quick Rinse
Every seven days, give your EV a thorough rinse with a hose. This removes loose dirt, pollen, and road salt before they bond to the paint. Takes 10 minutes and prevents 90% of contaminant buildup. If you notice bird droppings or tree sap, spot-clean immediately with detailing spray, don’t wait for your next wash.
Bi-Weekly: Full Wash
Every two weeks, perform a complete two-bucket wash following the process from Step 1. This maintains the protective coating’s effectiveness and removes contaminants that rinsing can’t handle. Skip automatic car washes, which can scratch your ceramic coating and reduce its lifespan.
Monthly: Damage Inspection
Once a month, walk around your EV in good light and inspect for chips, scratches, or areas where the coating appears compromised. Check for water beading, if you notice flat spots where water no longer beads, those areas need attention. Early detection prevents minor issues from becoming expensive repairs.
Quarterly: Sealant Top-Up
Most ceramic coatings last years, but a spray sealant top coat every three months refreshes protection. Takes 30 minutes and extends your coating’s life significantly.
Adjust frequency based on your environment. Coastal areas need more frequent washing due to salt exposure. Tree-parked vehicles require daily contaminant checks.
How to Check Your Protection Is Working
Run your hand across the hood after washing, properly protected paint feels slick and glassy smooth, almost hydrophobic to the touch. If you notice a rough, gritty texture or sticky patches, your protective layer has likely degraded and needs reapplication.
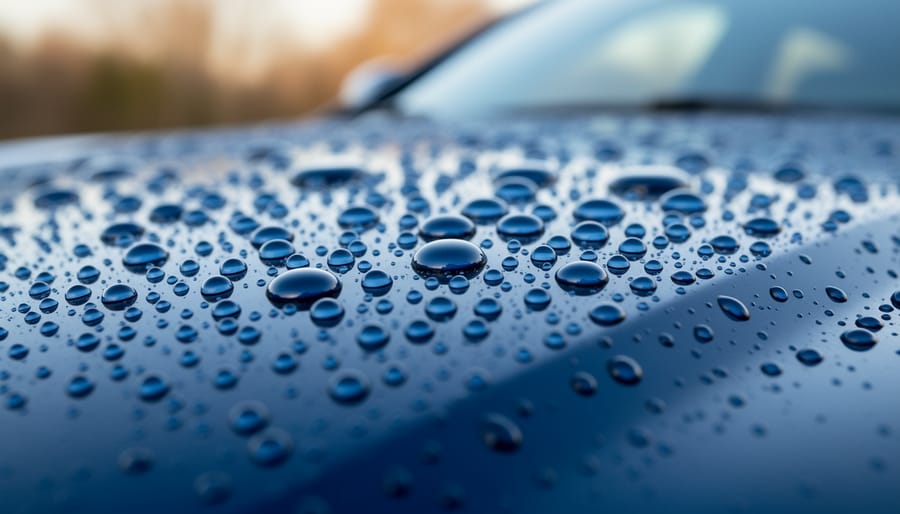
The water beading test is your most reliable indicator. Spray a section of clean, dry paint with water and watch how it behaves. Protected paint causes droplets to form tight, round beads that roll off easily, while unprotected or failing clear coat allows water to sheet across the surface or form flat puddles. Test multiple areas since protection can wear unevenly on frequently exposed panels like the roof and hood.
Check your protection regularly using these verification methods:
- Water beading test: Look for tight, round droplets that roll off, flat sheeting indicates protection failure
- Visual inspection: Scan for dull spots, chalky residue, or color fading, especially on horizontal surfaces
- Touch test: Run your palm across clean paint, it should feel glass-smooth, not rough or tacky
- Comparison photos: Take monthly pictures from the same angles to spot gradual deterioration
- Contaminant resistance: Bird droppings and tree sap should wipe away easily without staining
Take reference photos when you first apply protection, then monthly shots afterward from identical positions. Place the images side-by-side to detect subtle fading or gloss loss that happens gradually. Pay special attention to the roof if your EV has solar panels, the area immediately surrounding them often takes the hardest UV beating.
Healthy protected paint maintains deep color saturation and mirror-like reflections even after years outdoors. Deteriorating clear coat appears hazy in certain light, feels rough despite washing, and may show spiderweb-like cracks on close inspection. Apply these same maintenance tips to verify your vehicle’s solar charging system stays equally protected from the elements.
Common Mistakes to Avoid
Most outdoor EV owners make avoidable mistakes that accelerate paint damage. Using dish soap or household cleaners strips away protective waxes and sealants because these products contain degreasers designed for kitchen grime, not automotive finishes. Stick with pH-neutral car wash soap formulated specifically for vehicle paint.
Skipping the clay bar treatment leaves embedded contaminants that prevent ceramic coatings from bonding properly. You’ll waste money on protection products that can’t adhere to contaminated paint. Always clay bar before applying any long-term sealant.
Applying ceramic coatings or sealants in direct sunlight causes them to flash-cure unevenly, creating streaks and high spots that require aggressive polishing to remove. Work in shade or during cooler morning hours when your EV’s surface temperature is below 70°F.
Using dirty wash mitts or towels scratches paint with trapped particles, creating swirl marks that dull your finish. Keep separate buckets for washing and rinsing, and use fresh microfiber towels for drying. Once a towel touches the ground, it goes straight to the laundry.
Over-relying on automatic car washes damages paint through abrasive brushes and recycled water containing dirt from previous vehicles. The harsh climate challenges your outdoor-parked EV already faces get worse when you add regular mechanical scrubbing. Hand washing takes longer but preserves your protective layers and prevents unnecessary wear.
Frequently Asked Questions
How often should I reapply ceramic coating or sealant?
Quality ceramic coatings can last 2-5 years with proper maintenance, while paint sealants typically need reapplication every 3-6 months depending on exposure. Your reapplication schedule depends on climate harshness and how well the water beading test performs during monthly inspections.
Is paint protection film worth the cost for an outdoor-parked EV?
PPF offers the strongest physical protection against rock chips, scratches, and UV damage, making it a smart investment if you plan to keep your EV long-term or live in an area with harsh weather. Expect to pay $2,000-$7,000 for full-vehicle coverage, but it can preserve resale value by thousands more while eliminating the need for frequent reapplication of other products.
Do ceramic coatings work in extreme climates?
Yes, ceramic coatings perform well in both scorching heat and freezing cold, though UV exposure in sunny climates may gradually reduce their effectiveness over time. The key is choosing a product rated for your specific climate and following the manufacturer’s cure time precisely, which can vary with temperature and humidity.
Do I need to avoid the solar panels when washing my EV?
Most aftermarket rooftop solar panels are designed to withstand rain and car washes, but check your installation manual for specific pressure limits. Use the same gentle, pH-neutral approach you’d use on paint, avoid high-pressure direct spray on panel seams, and never wash while the vehicle is actively charging from the solar system.
Beyond these common concerns, you might wonder about the overall cost of maintaining protected paint. A basic protection routine using quality wash soap, sealant, and microfiber towels runs about $100-$200 annually in products, plus your time. Professional ceramic coating application costs $500-$1,500 but reduces ongoing maintenance effort significantly. Compare this to the $3,000-$5,000 cost of repainting faded or damaged panels, and the investment pays for itself many times over.
Paint protection won’t affect your solar charging efficiency at all. The protective coatings sit on your vehicle’s paint surface, nowhere near the charging system or battery. Whether you use rooftop solar panels, plug into a home solar setup, or rely on public charging, your paint care routine operates completely independently from the electrical components. The only overlap is timing your washes to avoid spraying water near open charging ports during active charging sessions, which is basic electrical safety rather than a paint protection concern.
Protecting your solar-charged EV’s paint doesn’t require expertise or expensive tools. A consistent routine, regular washing, ceramic coating, and strategic use of covers, keeps your vehicle looking new and preserves its resale value. EVs with maintained exteriors command 10-15% higher resale prices than neglected ones, making this time investment genuinely profitable.
Start with a thorough deep clean and ceramic coating this weekend. The initial setup takes a few hours, but maintenance drops to 20 minutes weekly once you’ve established the routine. Your solar charging setup benefits too, since clean panels perform better and a well-maintained vehicle reflects the care you’ve put into your sustainable transportation choice.
Outdoor parking and solar charging work together when you protect what matters. The same sun that powers your daily commute also threatens your paint, but the solution is simple: clean regularly, protect consistently, and address contaminants immediately. You’ve already invested in sustainable technology. Protecting that investment extends its life, reduces waste, and keeps your EV performing exactly as intended, economically and environmentally sound from every angle.